Enable Auto Save in Visual Studio Code
When coding we mostly forget to save our programs and directly run them in visual studio code, and this sometimes leads to program being not compiled or executed, as we have to save the program before pressing the run button. Though there is a solution for this and in today’s article we’ll find out how to Enable AutoSave in Visual Studio Code.
Well, programming in visual studio code is a pretty enjoyable task but the only problem that occurs in visual studio code is off saving the written programs.
Video Tutorial: Enable Autosave in Visual Studio Code
Step 1: Enable Autosave in Visual Studio Code
1) Firstly open your visual studio code, and open settings by pressing “Ctrl+,” if you’re using a windows machine or press “Cmd+,” if you’re on a Mac machine.
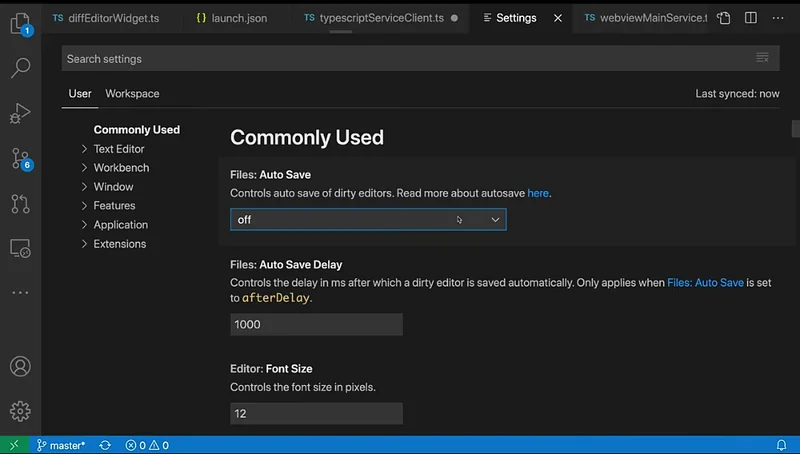
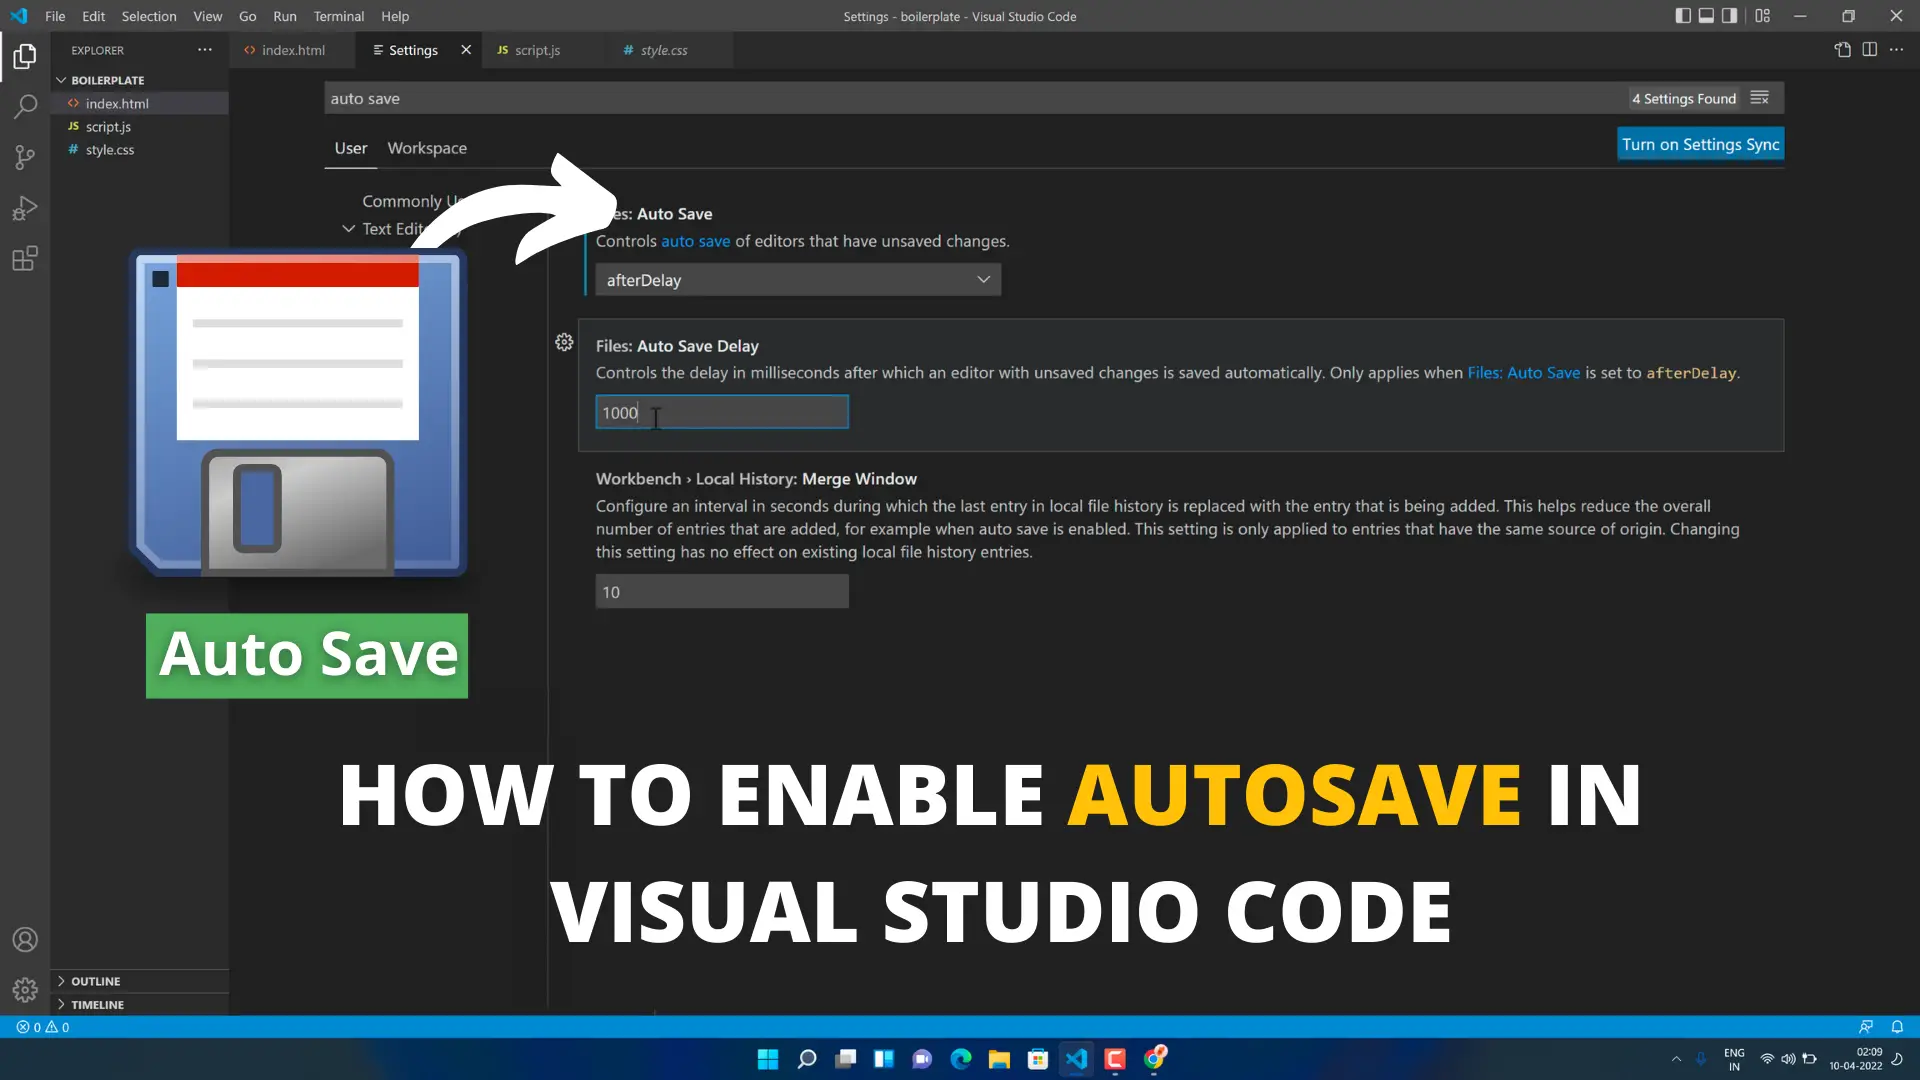
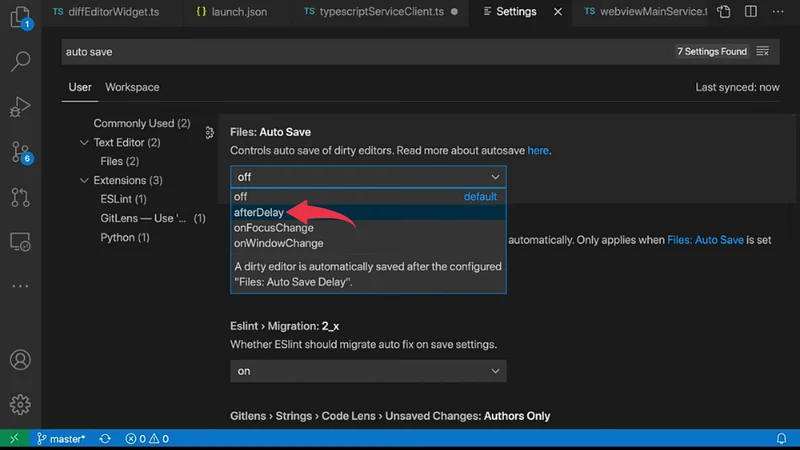
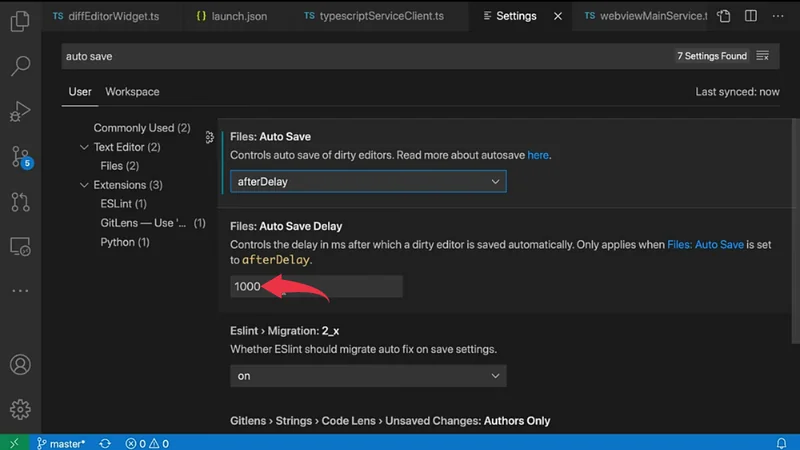
2) Now in the search bar type “autosave” and in the “Files: AutoSave” list select the option “afterdelay“.
3) After that in the “Files: Auto Save Delay” list, set your desired delay time in milliseconds after which visual studio code will automatically save the changes in a file. In our case, it’s “1000”.
And you’re all done 👍👍, now visual studio code will automatically save the changes for you. Now you’re able to successfully enable autosave in visual studio code.
For more information about AutoSave feature in visual studio code, follow this Basic Editing in Visual Studio Code article from Microsoft.
Also Read: How to Install Netflix on Mac M1 Big Sur