How To Install Visual Studio Code in Windows 11
When it comes to programming the IDE you’re using plays a vital role. However, there are different IDE for different programming languages. But Visual Studio Code is one of the very few development environments where you can write and run programs for almost every language. If you are looking for how to install visual studio code in windows 11 then you are in the right place because in this article we’re going to learn how you can install Visual Studio Code in Windows 11.
Video Tutorial: How To Install Visual Studio Code in Windows 11
If you’re finding it hard installing Visual Studio Code on Windows 11 PC then you can refer to the below video for a complete guide.
Step 1: Download Latest version of Visual Studio Code
1) Firstly we’ll download the latest available version of Visual Studio Code. Follow the below-provided download link and you’ll be redirected to the official visual studio code downloads page. There click on the “Download for Windows” button and your download will start.
Download Visual Studio Code Here: https://code.visualstudio.com

Step 2: Install latest version of Visual Studio Code
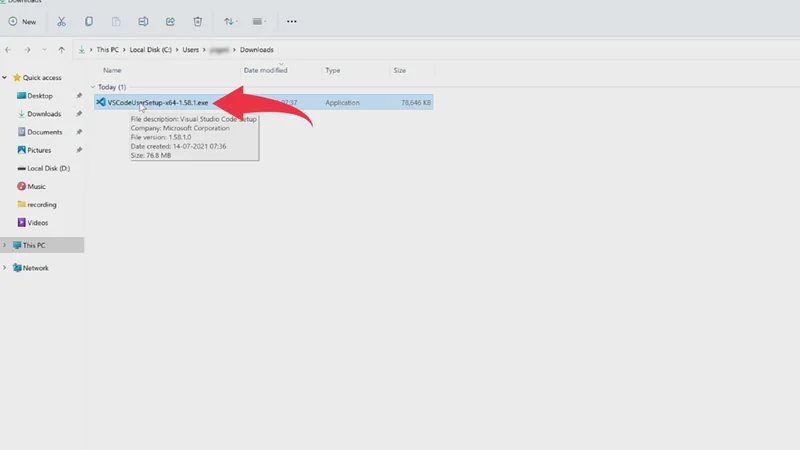
1) Once the download gets finished open the downloaded vs code file in the folder where it has been downloaded. Double click on the downloaded visual studio code file to start the installation window.
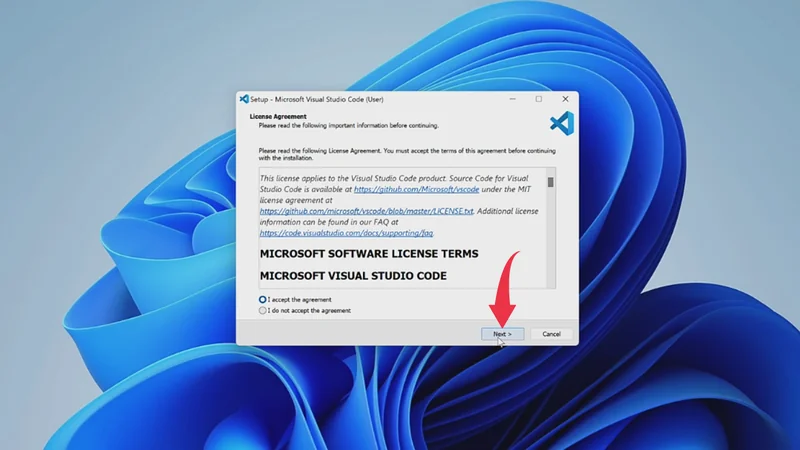
2) Now you’ll be asked to accept the license agreement in the installation window. Simply check the “I accept the agreement” button and click on next.
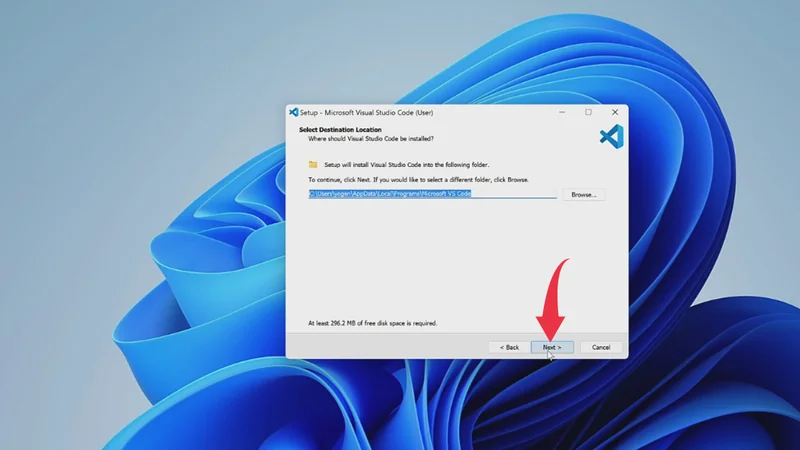
3) You’ll be asked to select the installation folder for Visual Studio Code. Here we will go with the default installation location so simply click next.
Make sure to have at least 297Mb of free space available for visual studio code installation.
4) A select start menu window will show up and here as well we don’t need to change anything therefore simply click next.

5) In the select additional tasks window check the “create a desktop icon” & “add to path” checkboxes and click next.

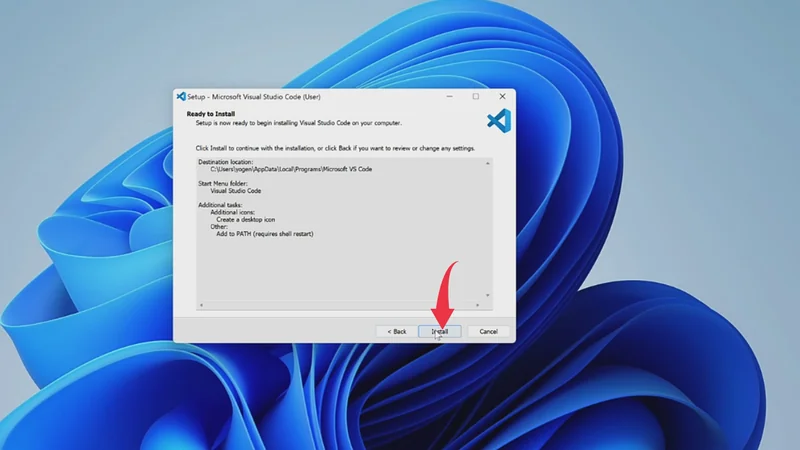
6) Now in this ready to install window click on install button to start the installation process of Visual Studio Code in your windows 11 machine. This installation may take some time so have patience.
7) Once the installation gets completed click on the finish button and after that Visual Studio Code will start automatically.
We would recommend you to restart your desktop after installation of vs code as it will help to add the path in the environment variable.

Also Read: How to Install Go in Windows 10