How to uninstall Visual Studio Code on Windows 10
Using visual studio code for Programming is pretty good and fun but sometimes some unexpected errors may occur and in that case, you might need to remove or uninstall visual studio code completely from your machine, so in this article let’s find out how you can uninstall visual studio code in windows 10 completely.
Step 1: Uninstall Visual Studio Code
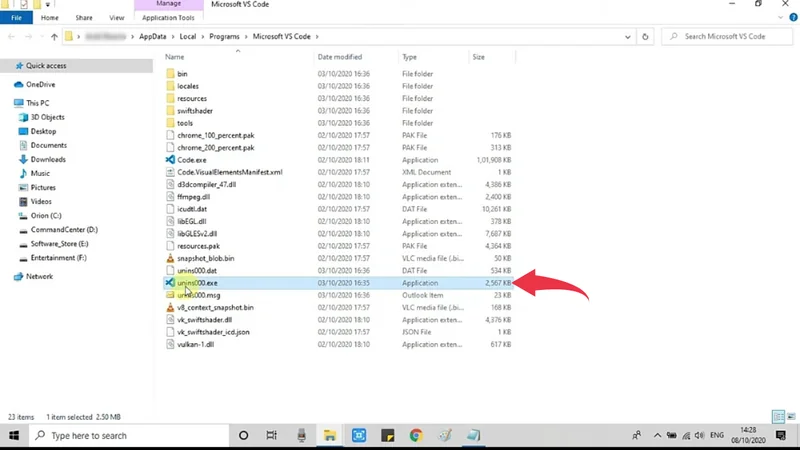
1) Open the installation path of visual studio code by right-clicking on the visual studio code icon and select the “Open File Location” option.

2) Now in this opened folder, find the “unis000.exe” file and double click on it to start uninstalling the process.
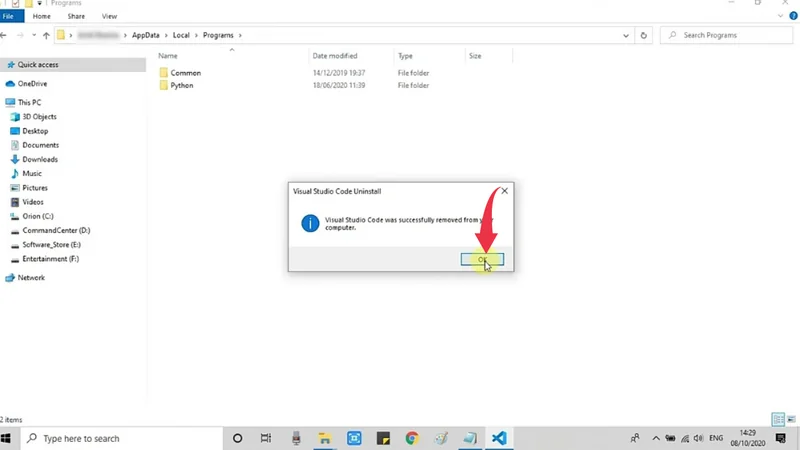
3) A dialogue box will appear simply click on the “yes” button and visual studio code will begin to uninstall, after that a uninstall successful dialogue box will appear here as well as click on “Ok“.
Step 2: Delete Remaining Visual Studio Code Files
4) Now head towards the “C:\Users\name\AppData\Roaming” directory and delete the folder named “Code“.
Do note that in the above directory structure ‘name’ is the name of the user you’re logged in as

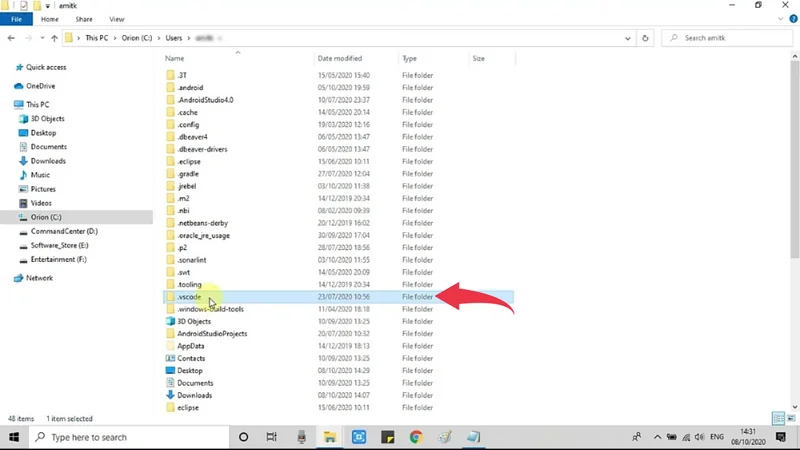
5) At last go to “C:\Users\name” directory and delete the folder named “.vscode“.
Do note that in the above directory structure ‘name’ is the name of the user you’re logged in as
By following the above steps we hope that you were able to uninstall visual studio code on windows 10 successfully.
However, if you want to know more about uninstalling visual studio code, then read this Uninstall Visual Studio Code article.
Also Read: How to Run C# in Visual Studio Code on Windows 10