How To Run C++ in Visual Studio Code on Mac OS
Running a c++ program varies between different operating systems. However running it in visual studio code is pretty simple and does not requires any rocket science, just follow the steps mentioned in this article and you’ll be good to go. So let’s learn How To Run C++ in Visual Studio Code on Mac OS.
Video Tutorial: How to Run C++ in Visual Studio Code on Mac OS
If you’re still finding it hard running C++ programs in Visual Studio Code on your Mac machine then you can refer to the below video for a complete guide.
👉 Click Here To Enroll in Complete C++ Programming Course: Go From Beginner to Beyond with an additional discount.
👉 Click Here To Enroll in Complete C Programming Course: Go From Beginner to Master with an additional discount.
Download C++ Compiler for Mac OS
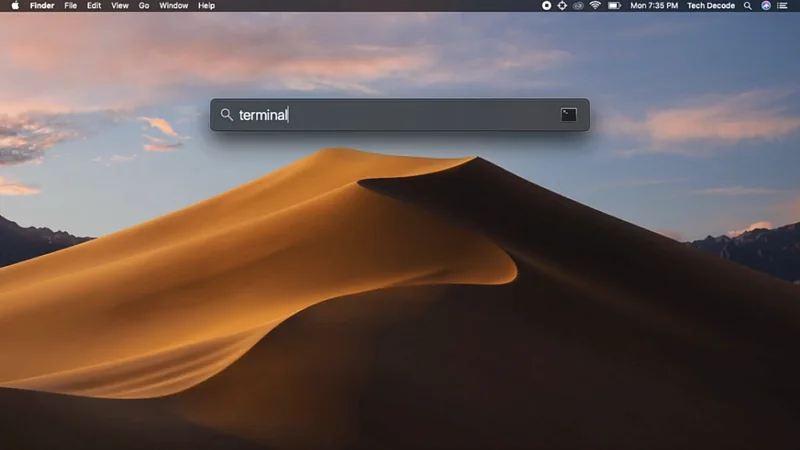
1) Firstly we will download the C++ compiler for our Mac machine and for that we’re going to download the MinGW compiler. So press Cmd+space, type terminal in the search bar and press enter.
2) In the terminal window copy the code provided below and press enter, this will install Homebrew in your Mac system. This process may take some time so keep patience.
Intel Mac:
/bin/bash -c "$(curl -fsSL https://raw.githubusercontent.com/Homebrew/install/HEAD/install.sh)"
M1 Mac :
arch -x86_64 ruby -e "$(curl -fsSL https://raw.githubusercontent.com/Homebrew/install/HEAD/install)" < /dev/null 2> /dev/null

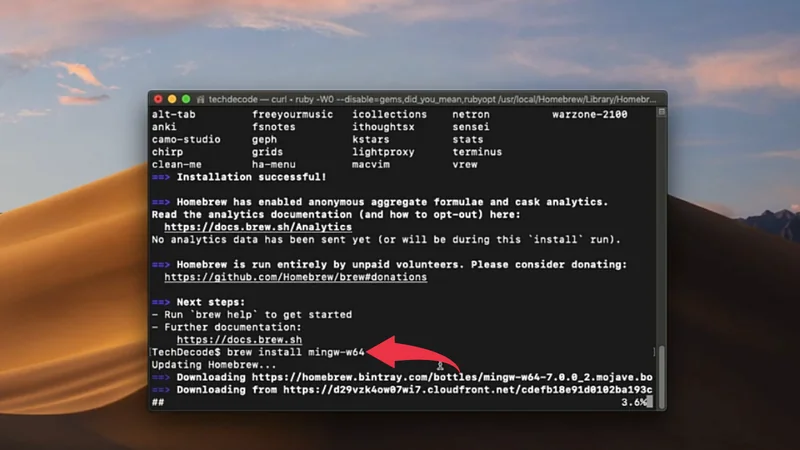
3) Now we’ll install the MinGw compiler on your Mac OS, simply paste the below-provided code and press enter, this process may also take some time. There will be a progress bar showing the percentage of download that has been installed.
Intel Mac: brew install MinGW-w64
M1 Mac: arch -x86_64 brew install MinGW-w64
Run C++ in Visual Studio Code on Mac OS
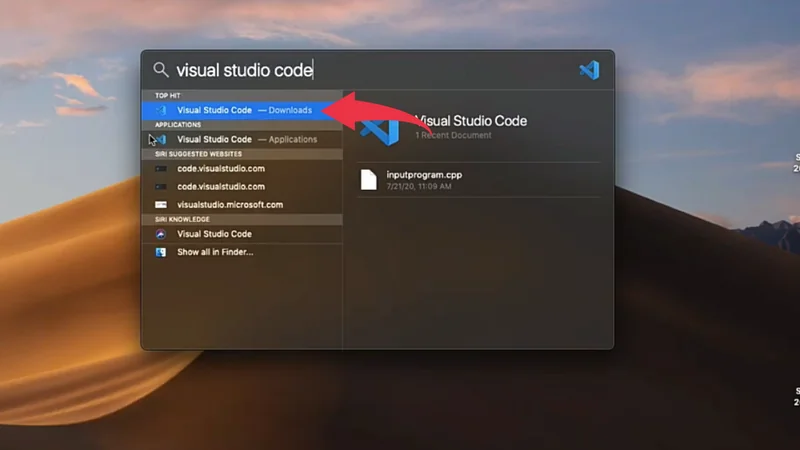
1) Open visual studio code, by pressing Cmd+space type visual studio code and press enter.
2) Click on the extension button and in the search bar type code runner, select the first option from Jun Han and click on the install button.

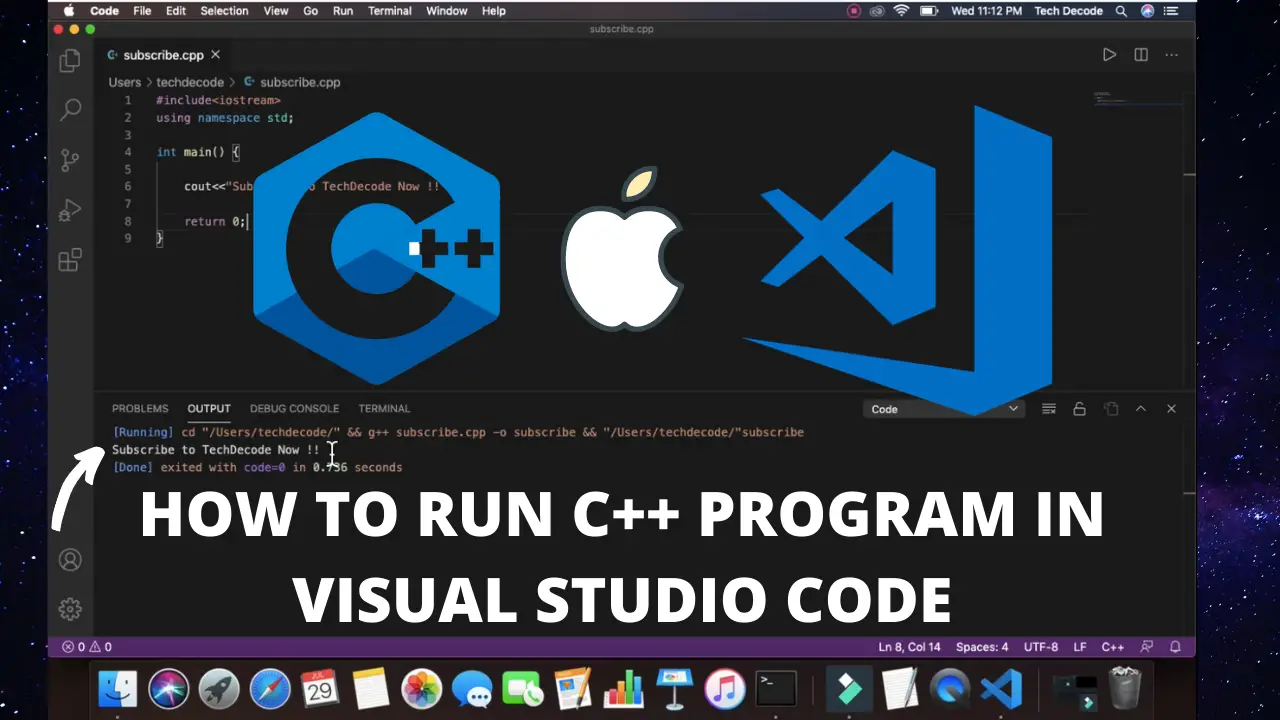
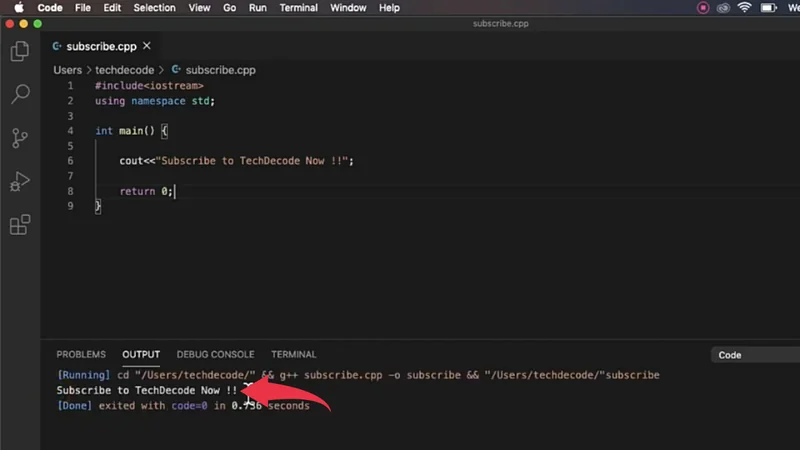
3) Now create a new file in visual studio code and save it as subscribe.cpp.

4) And paste the below-provided code snippet and press Cmd+S
#include<iostream>

using namespace std;

int main()
{

    cout<<"Subscribe To TedchDecode Now !!";

    return 0;
}

5) To Run the program press Cmd+Alt+N and you’ll see an output like the below image.
Fix Cannot Edit in reading Only Editor
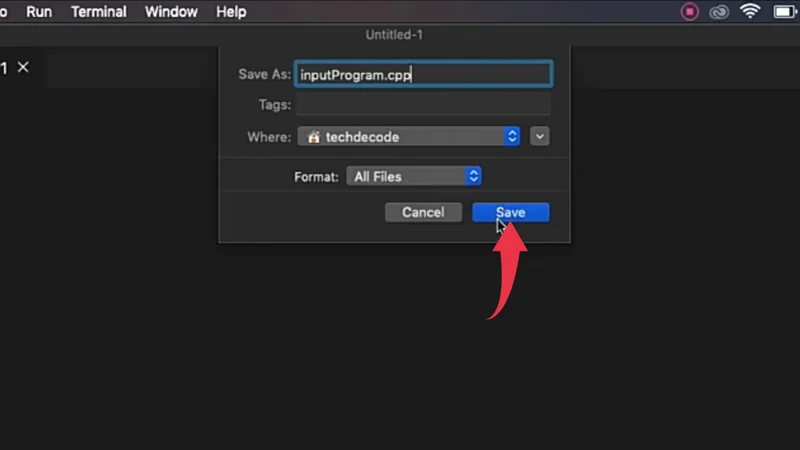
1) Now again create a new file in visual studio code and save it as an inputProgram.cpp
2) And paste the below-provided code snippet, press Cmd+S and run the program by pressing Cmd+Alt+N
#include<iostream>

using namespace std;

int main

string first_name, last_name;

cout<<"Enter your first name: ";

cin>>first_name;

cout<<"Enter your last name: ";

cin>>last_name;

cout<<"Your full name is: "<<first_name<<" "<<last_name<<endl;

return 0;

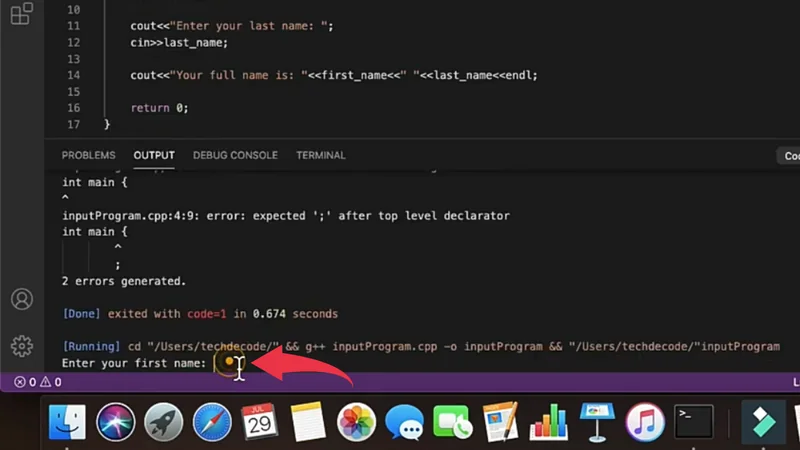
3) For the first time you will face an error like the below image.
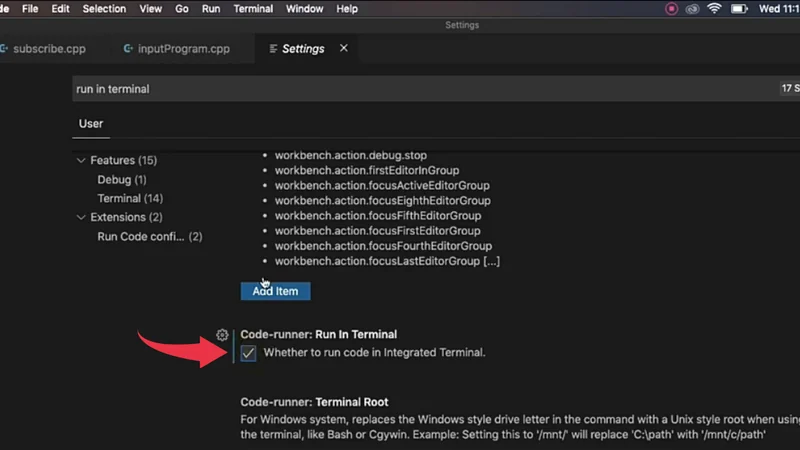
4) Open up settings by pressing Cmd+, In the search bar type Run In Terminal and hit enter. Scroll down and tick the Code Runner: Run in Terminal checkbox.
5) Now go back to the program we’ve created at step 2 and press Cmd+Alt+N this time it will show no errors.

👉 Click Here To Enroll in Complete C++ Programming Course: Go From Beginner to Beyond with an additional discount.
👉 Click Here To Enroll in Complete C Programming Course: Go From Beginner to Master with an additional discount.