How To Install QGIS on Mac OS Apple Silicon M1
Working with graphical data in itself is very much of a hassle. Just a little mistake and entire data changes. So one needs to be extremely precise when working with graphical data, things get more complicated when you have to work on geolocation map designing. Doing such tasks with accurate precision just bursts up the brain. So to make geolocation graphics, maps, etc making the process digitally easy you must use Qgis in your system. So in this article let’s learn how to install QGIS on Mac OS.
Also Read: How to Install QGis on Windows 11
Video Tutorial: How To Install QGIS on Mac OS
No need to worry guys, we’re working on the video tutorial for Installing Qgis on Mac OS, till then please follow the below article. If you get stuck Feel free to ask us questions.
Step 1: Download QGIS on Mac OS
1) Firstly we’ll download the latest available version of QGis. Follow the below-provided download link and you’ll be redirected to the official downloads page for QGis. There click on the “Download Now” button.
Download QGis Here: https://qgis.org/en/site/
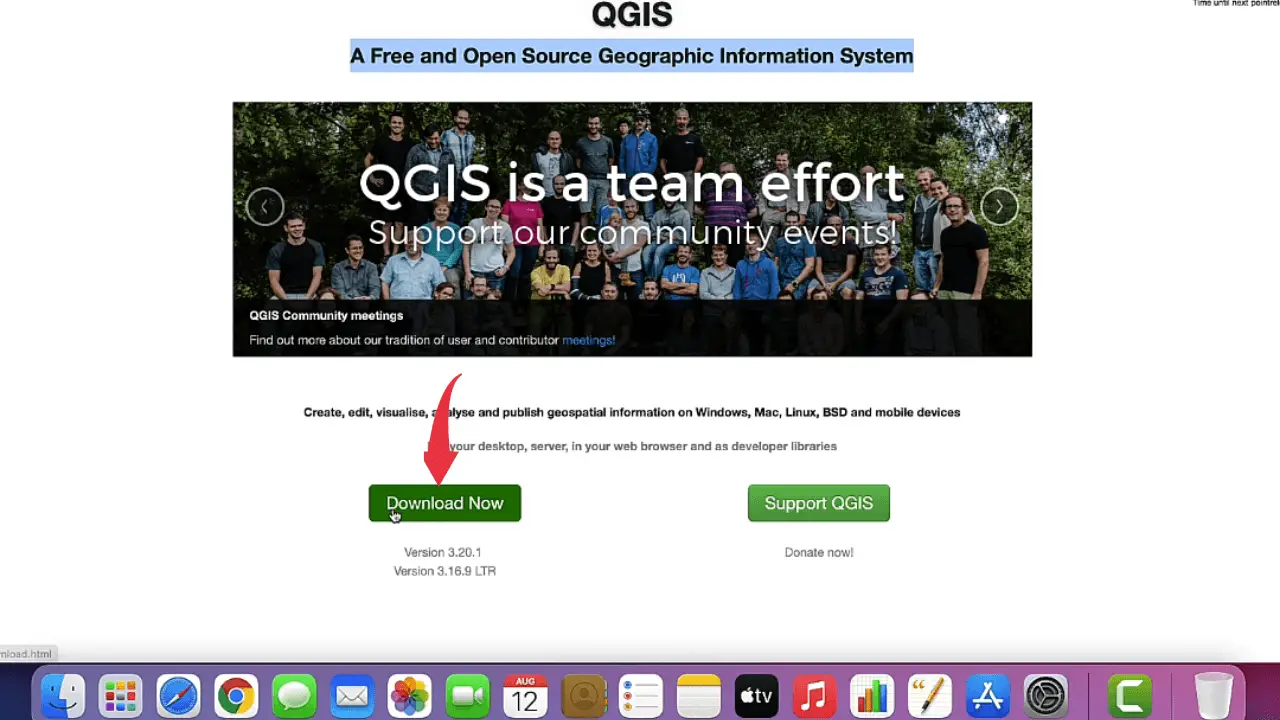
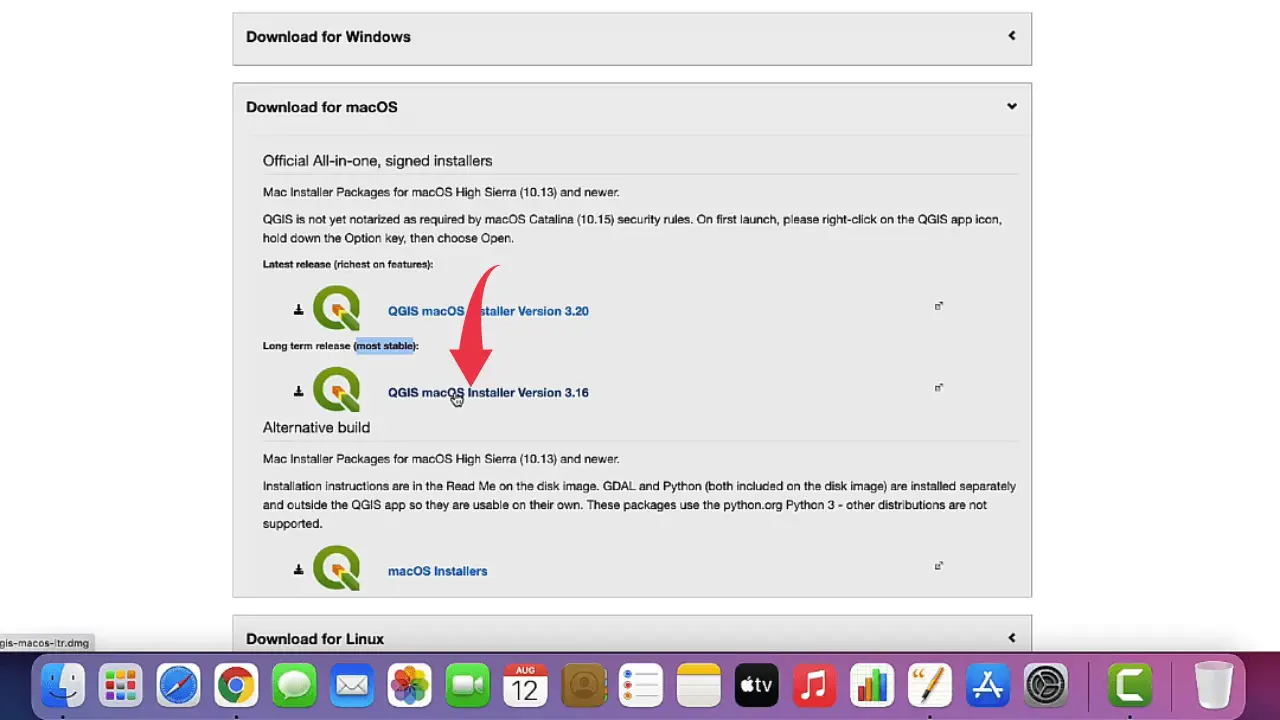
2) Next up you’ll be redirected to the QGis download page for Mac OS, here scroll down and click on the “QGis MacOs Installer Version 3.16” button. After that, your download will start.
Step 2: Install the Latest Version of QGis
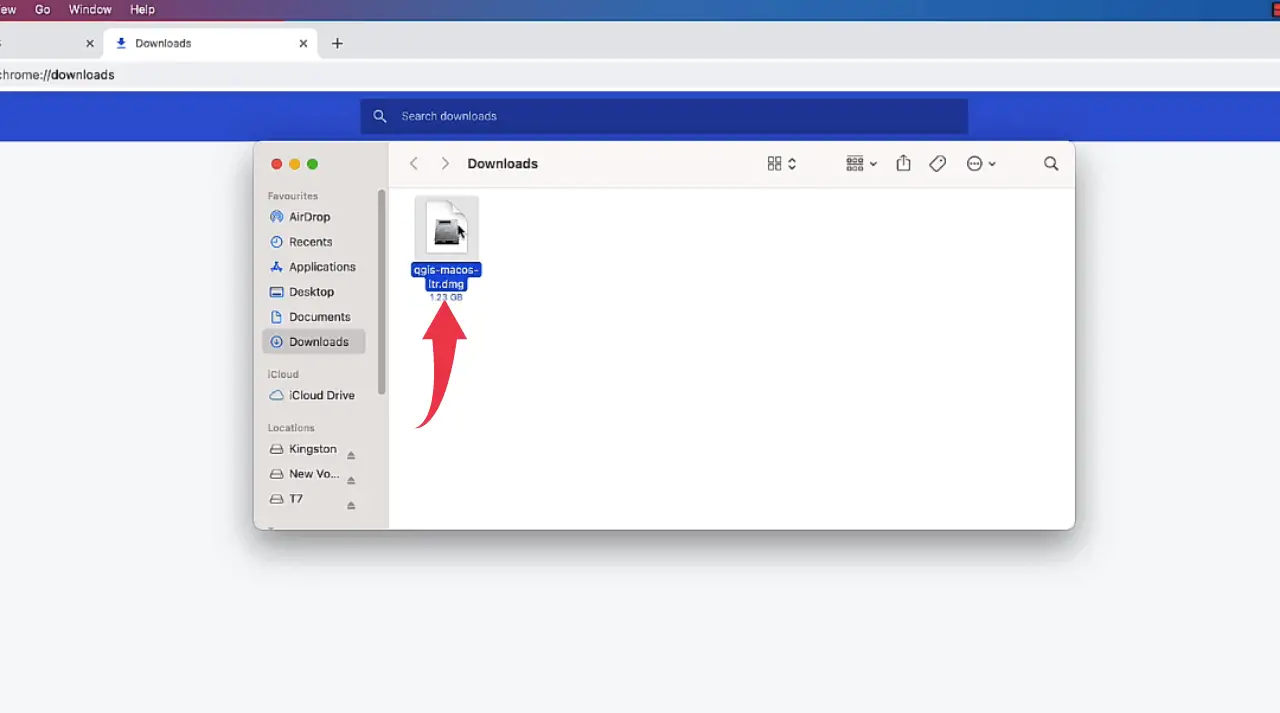
1) Once the download gets finished open the downloaded QGis file in the folder where it has been downloaded. Double click on the downloaded file to start the installation window.
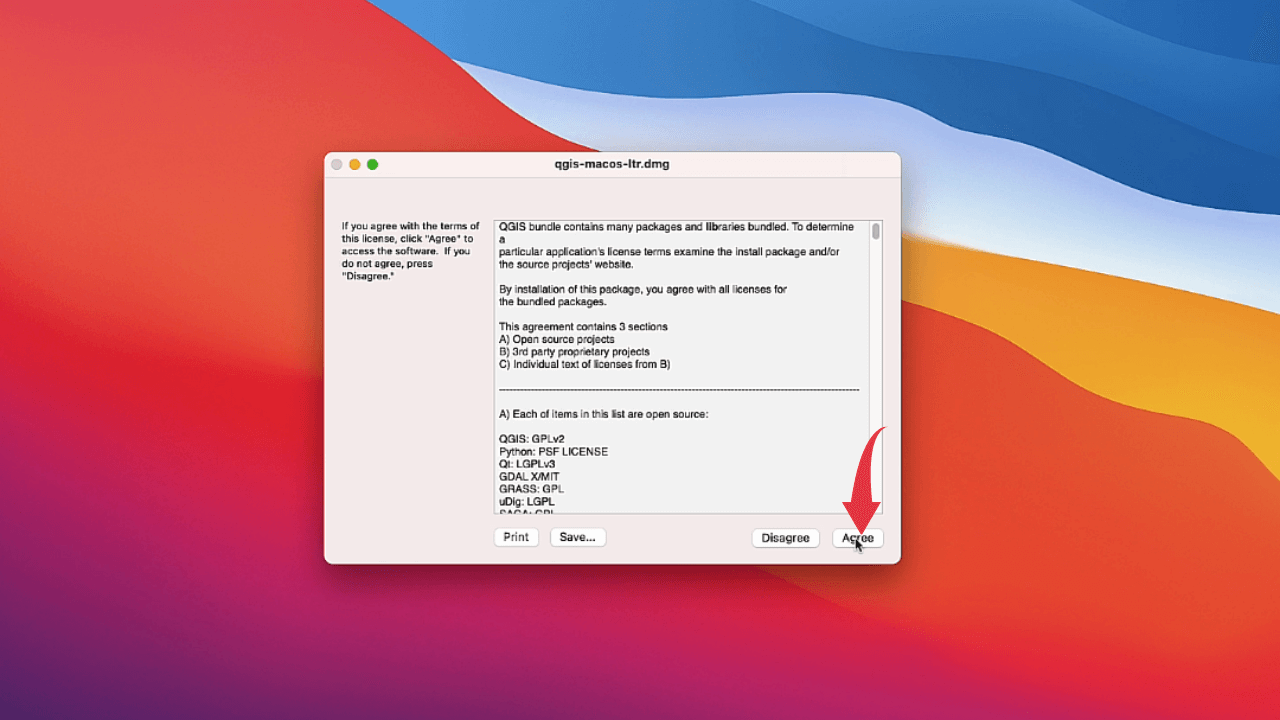
2) Now you’ll be asked to accept the license agreement in the installation window. Simply click the “Agree” button. After that the “.dmg” file will start getting extracted, this might take some time so have patience at this point.
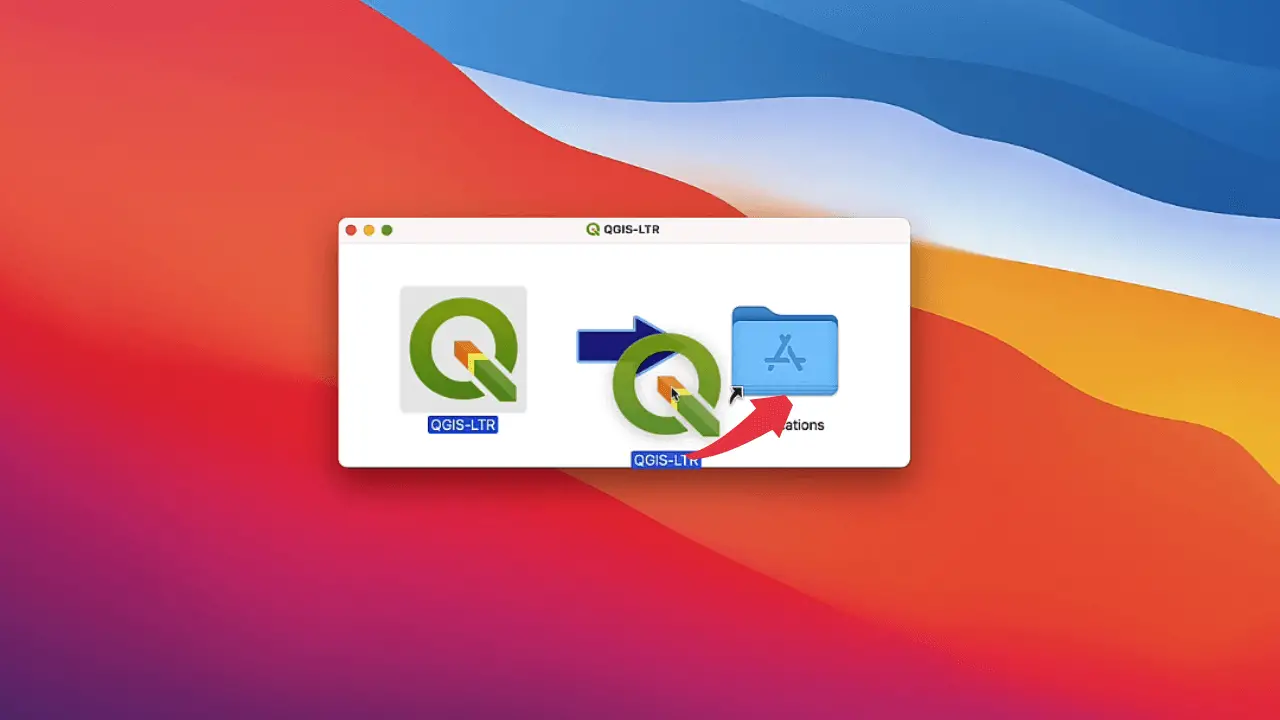
3) Once the DMG file opens up, drag the Qgis to the applications folder and wait for the file to be copied. This step will take some time, so have patience.
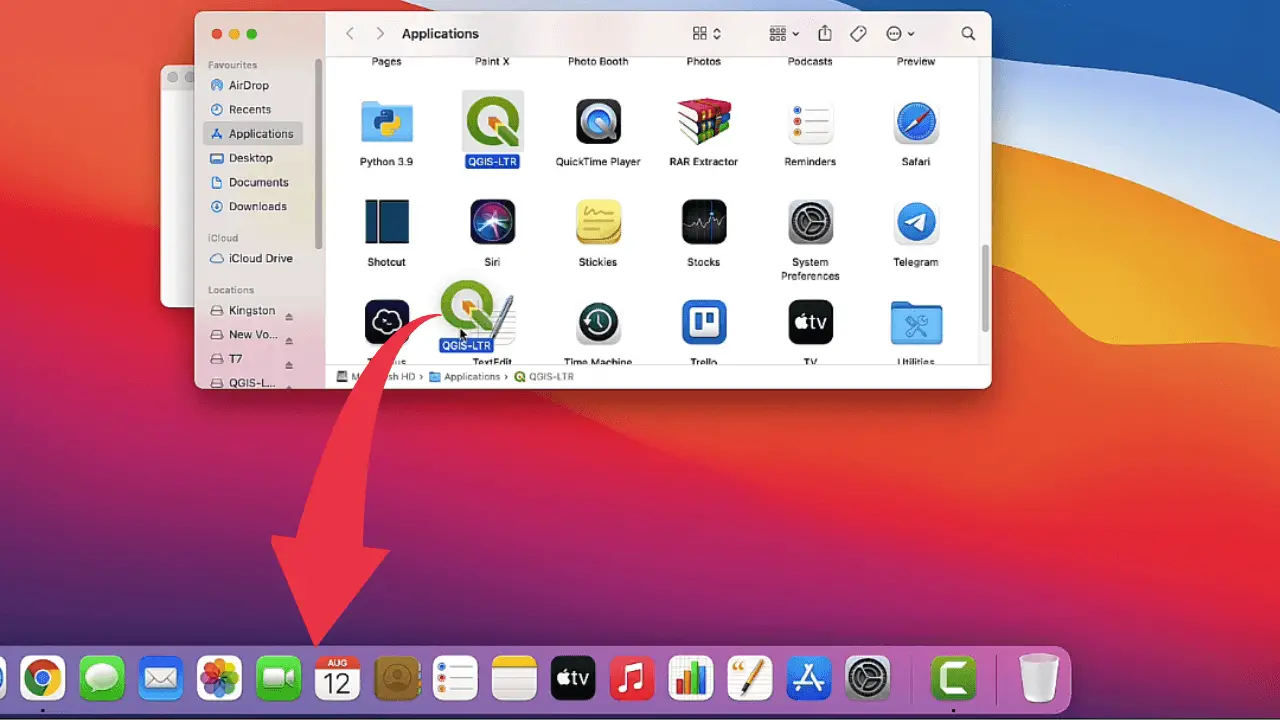
4) Once the above process gets finished add the Qgis application to Docker, by dragging the Qgis logo towards the Docker.
Apple Security Check
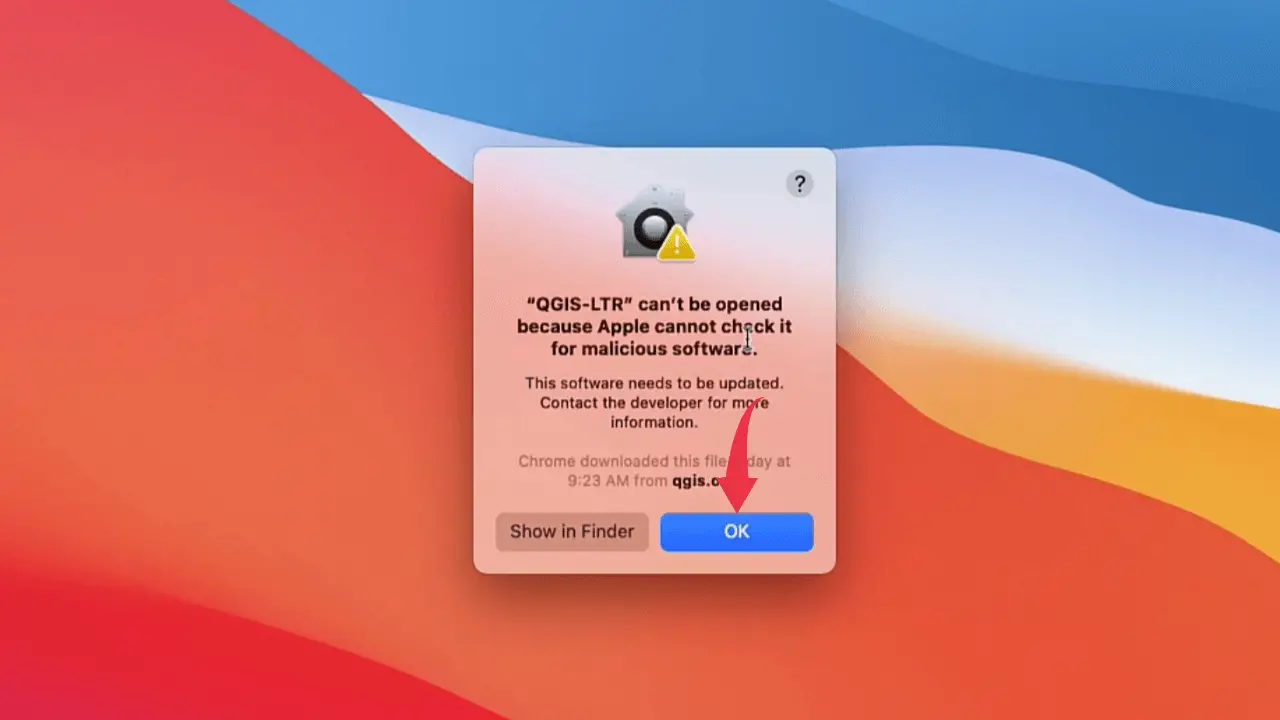
1) Chances are you’ll get the same warning just like the below image. So to fix this issue firstly click on the “ok” button.
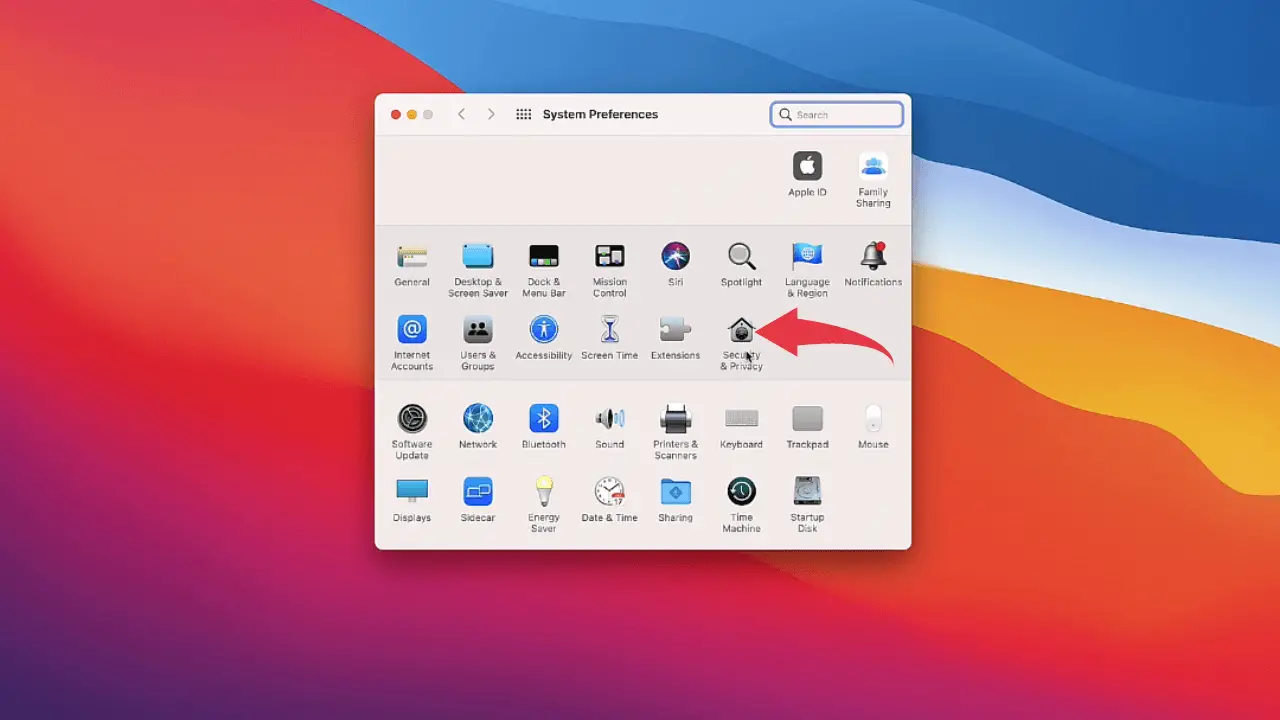
2) After that open “System & Preferences” and click on the “Security & Privacy” button.
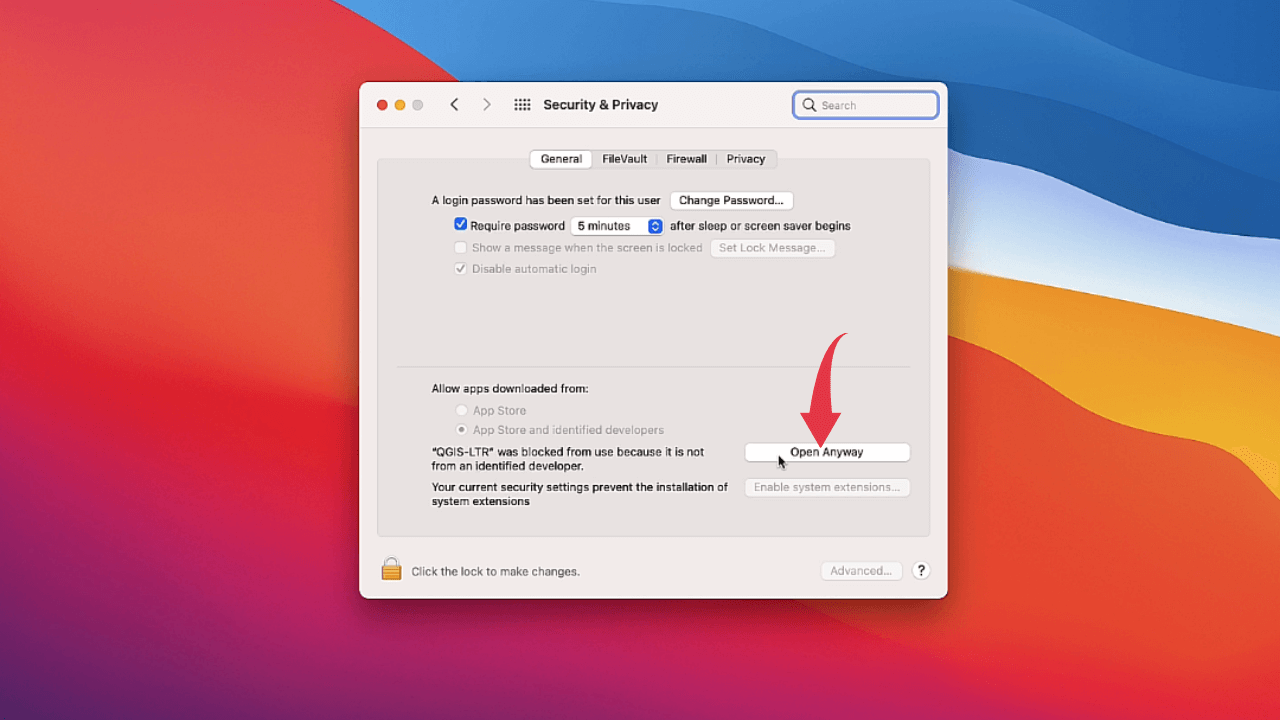
3) Now click on the “Open Anyway” button as shown in the below image.
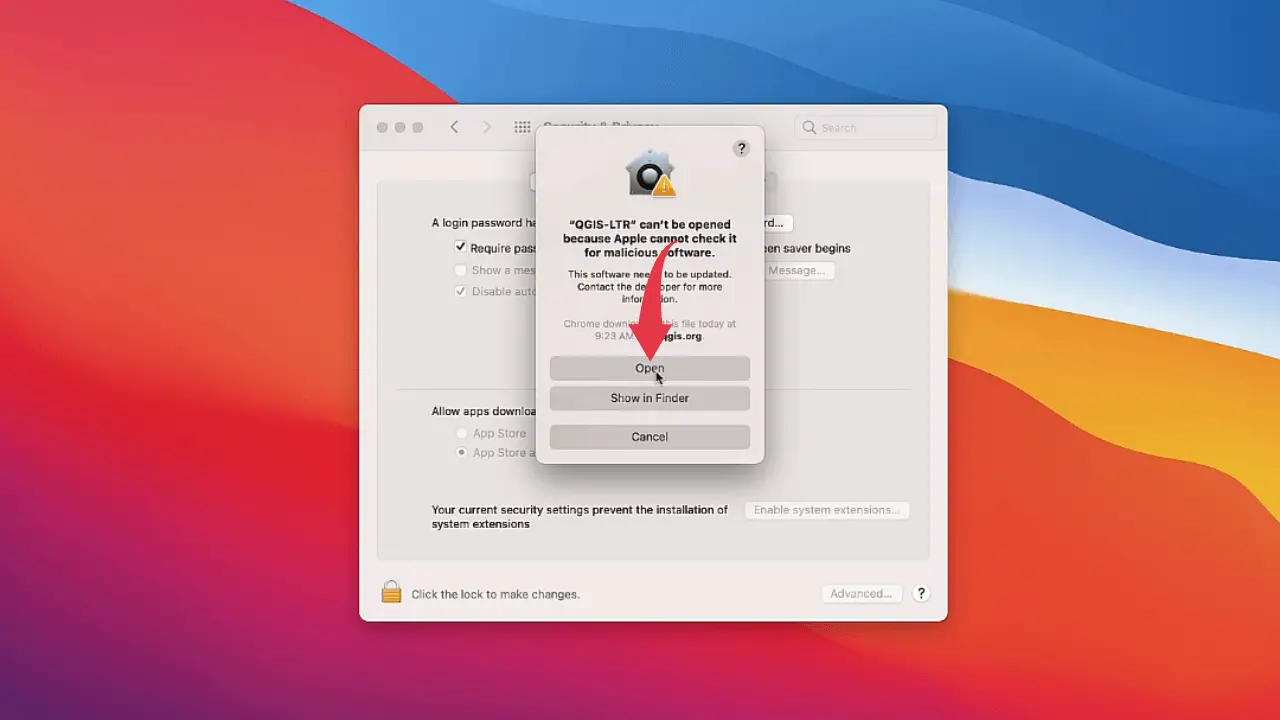
4) A new popup warning will show up, so here as well click on the “open” button. And after this, the warning will be gone.
Check Qgis Version
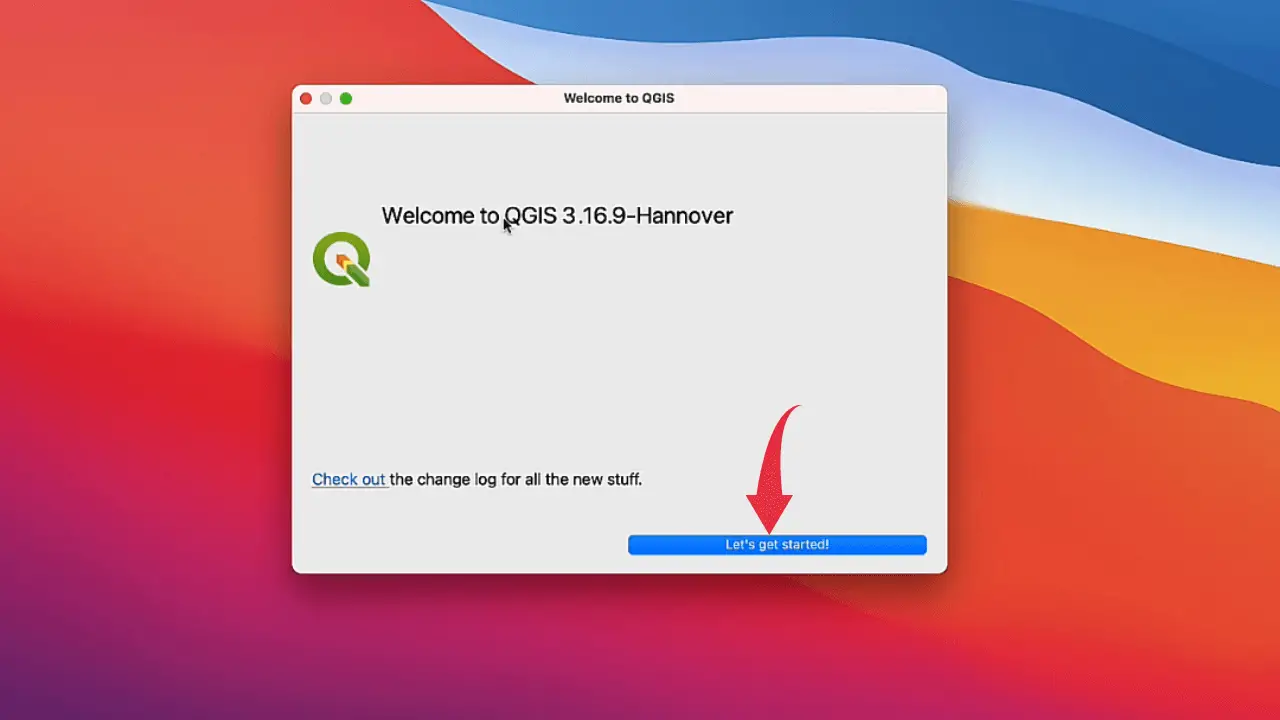
1) Open up Qgis in your Mac machine by double-clicking on the Qgis icon, if you’re opening it for the first time then in the opening window click on the “Let’s Get Started” button.
2) Now click on the “Help” button and after that click on “Check Qgis Version“.
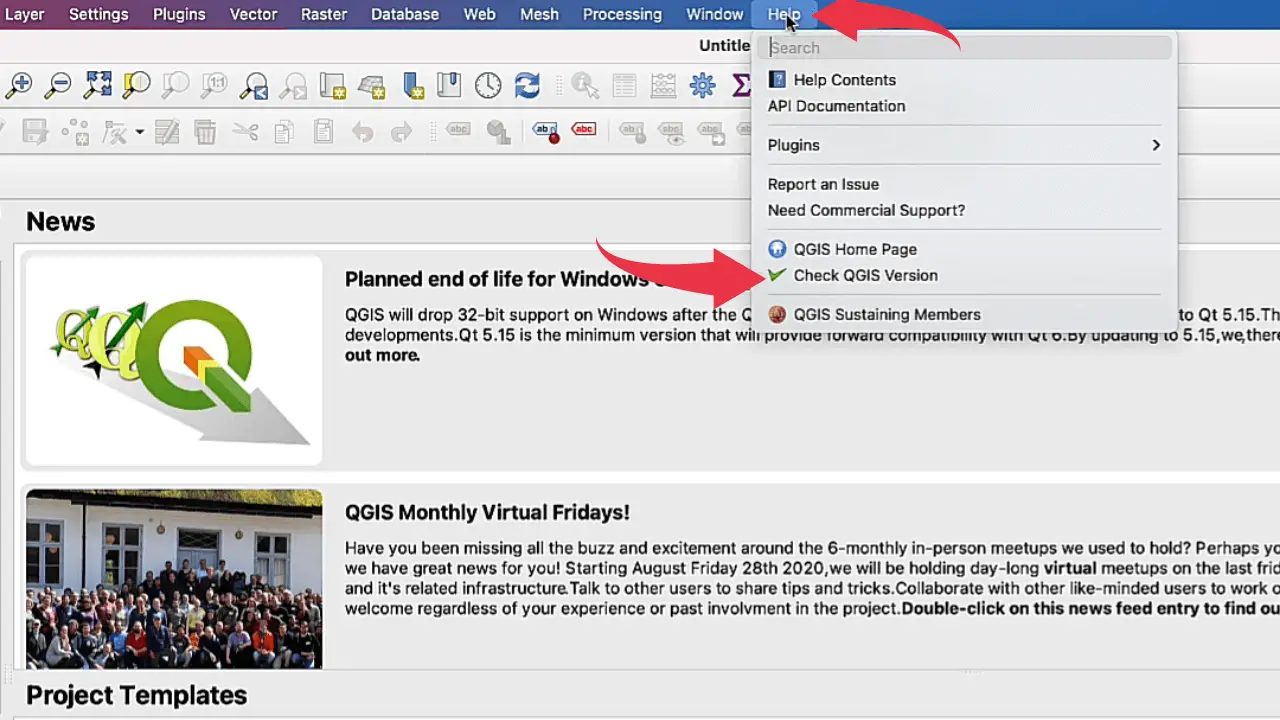
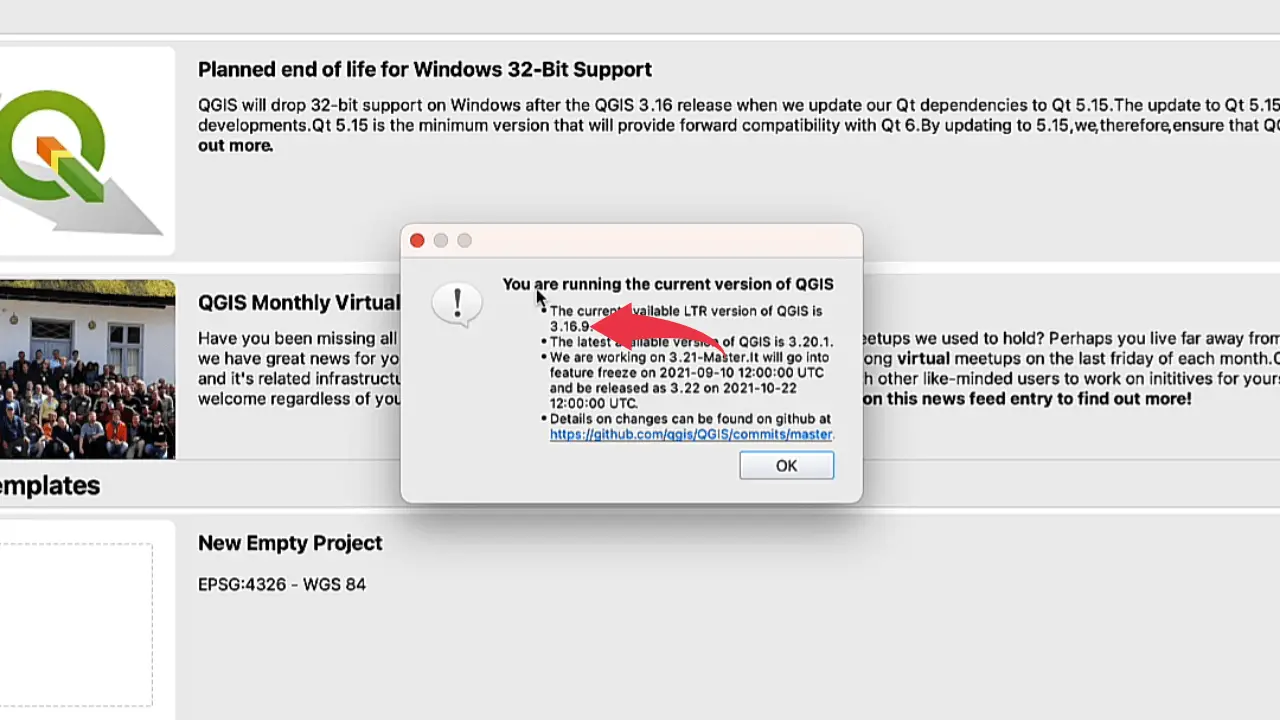
3) A new popup window I will show up just like the below image displaying the installed version of Qgis. In our case, it’s v3.16.9.
