Run Go Programs in Visual Studio Code on windows 10
When it comes to easy to understand languages there are very few names one can recall instantly. And one of the easiest programming languages to understand is GO (Golang), especially for server-side tasks. Developed by Google, this language is one of the fastest-growing languages and is mostly used for programming network infrastructures, server-side apps, Dev ops, etc. So in this article let’s learn how you can run GO in Visual Studio Code on Windows 10 PC.
Follow the below-mentioned steps, to easily install and run Go on your windows machine.
Step 1: Download Go in Windows 10
1) Firstly we’ll download the latest version of go from the internet, follow the below provided download link and you’ll be redirected to the official download page for GO language. There, simply click on the “Download Go” button.
Download Go Here: https://golang.org/

2) Now you will be redirected to a new page for selecting the platform, simply click on the link provided below the Microsoft Windows option. And your download will start.

Step 2: Install Go in Windows 10
1) Once the download gets finished open it in the folder where it has been downloaded. And double click on the downloaded file to start the installation wizard of GO.

2) A setup wizard with a welcome screen will now appear. Here click on the next button to continue the installation process.

3) In the license agreement window, tick the “I accept the terms in the license agreement” check box. And click on the next button.

4) Next we’ll be shown to select the installation path for GO. Here we won’t change anything so click on the next button.

5) In this final confirmation window, simply click on the install button. If a dialogue box appears click yes, and your installation will begin. It may take some time to install so have some patience.

6) Once the window appears saying “Completed the Go Programming Language Setup Wizard“, click on the finish button.

Step 3: Check Go Version
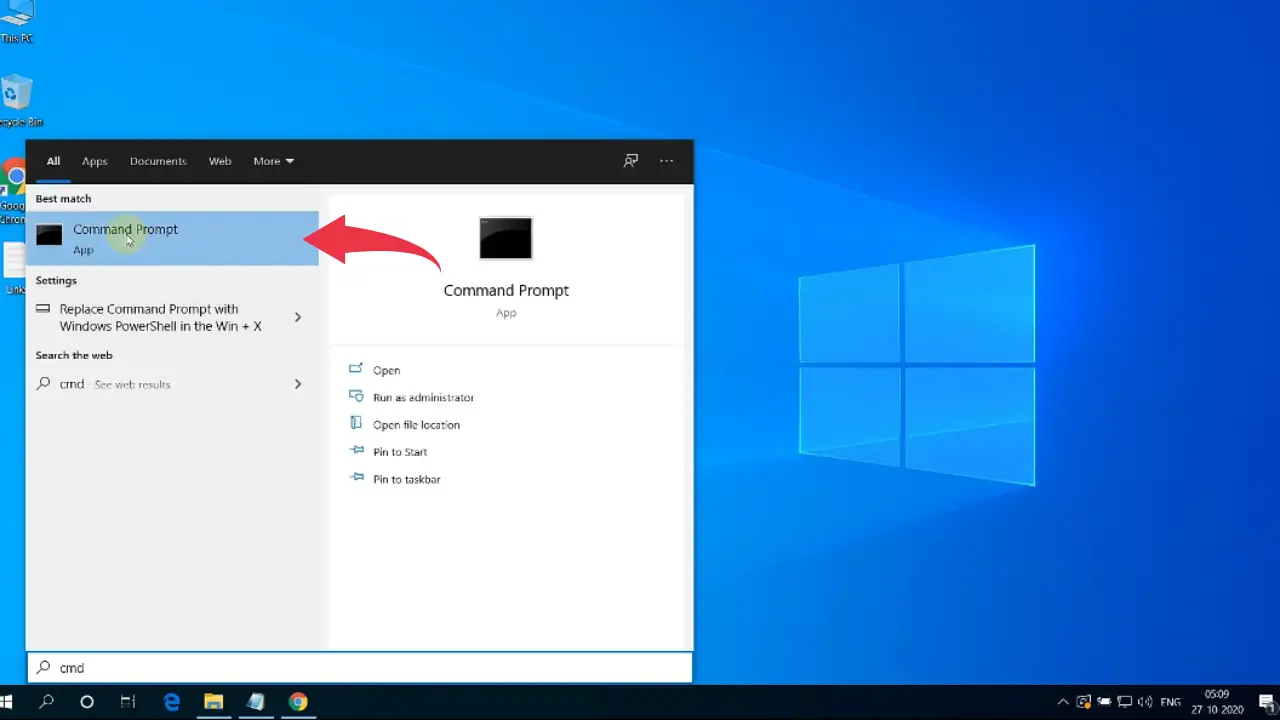
1) To check if Go is installed properly or not. Open up your command prompt by pressing the Windows button, type “cmd” and press enter.
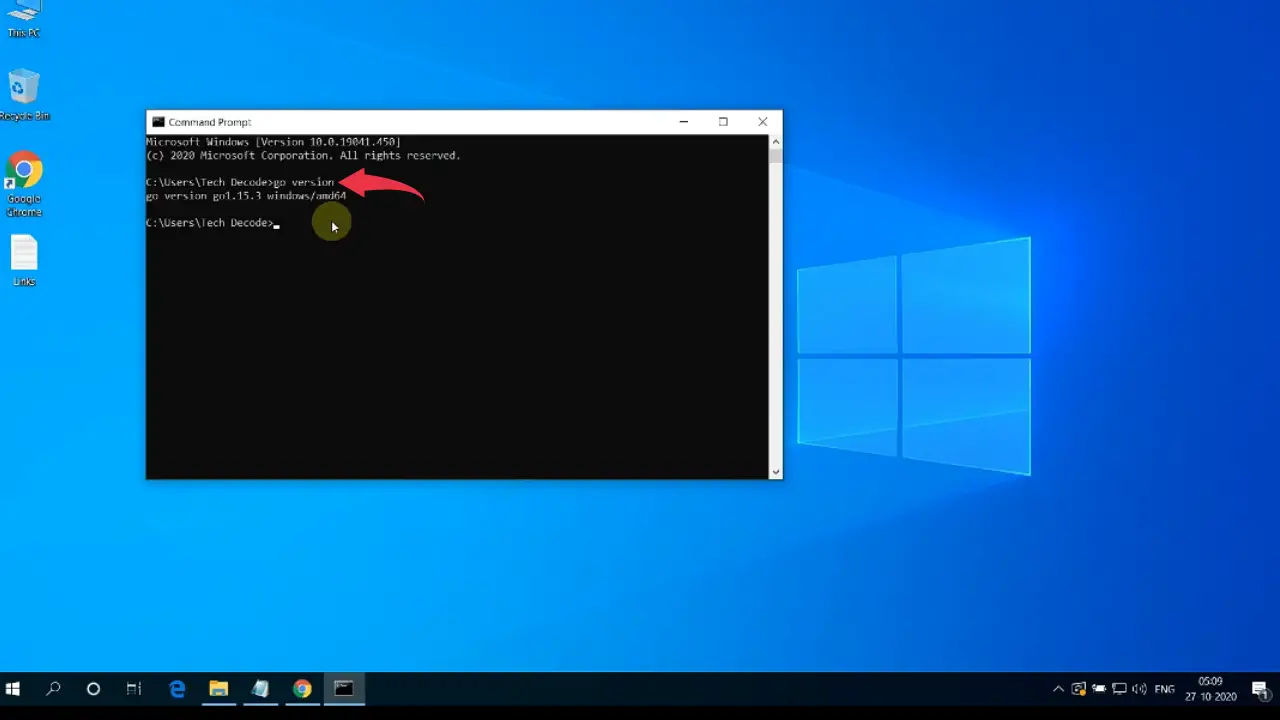
2) In the command prompt type, go version and press Enter key to check the installed version of GO.
Step 4: Install Go Extensions in Visual Studio Code
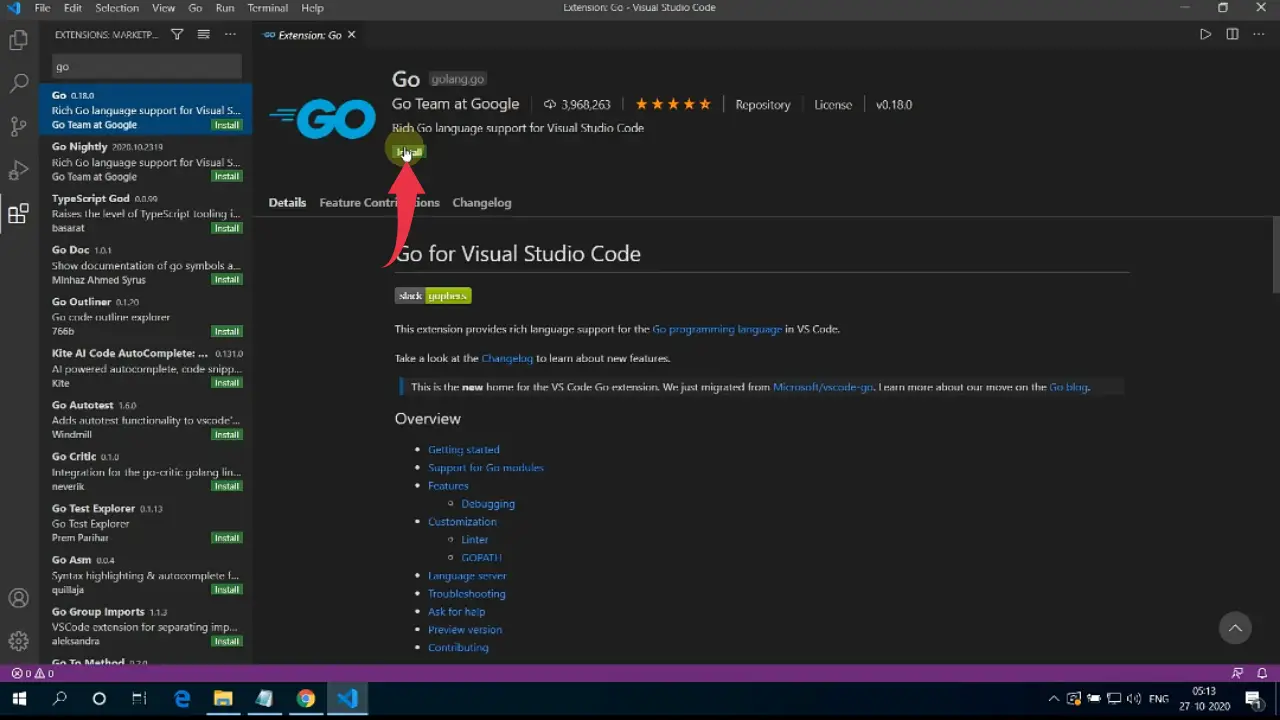
1) Open visual studio code, click on the extensions button, in the search bar type “GO” and install the first option from Team Google by clicking on the small green install button.
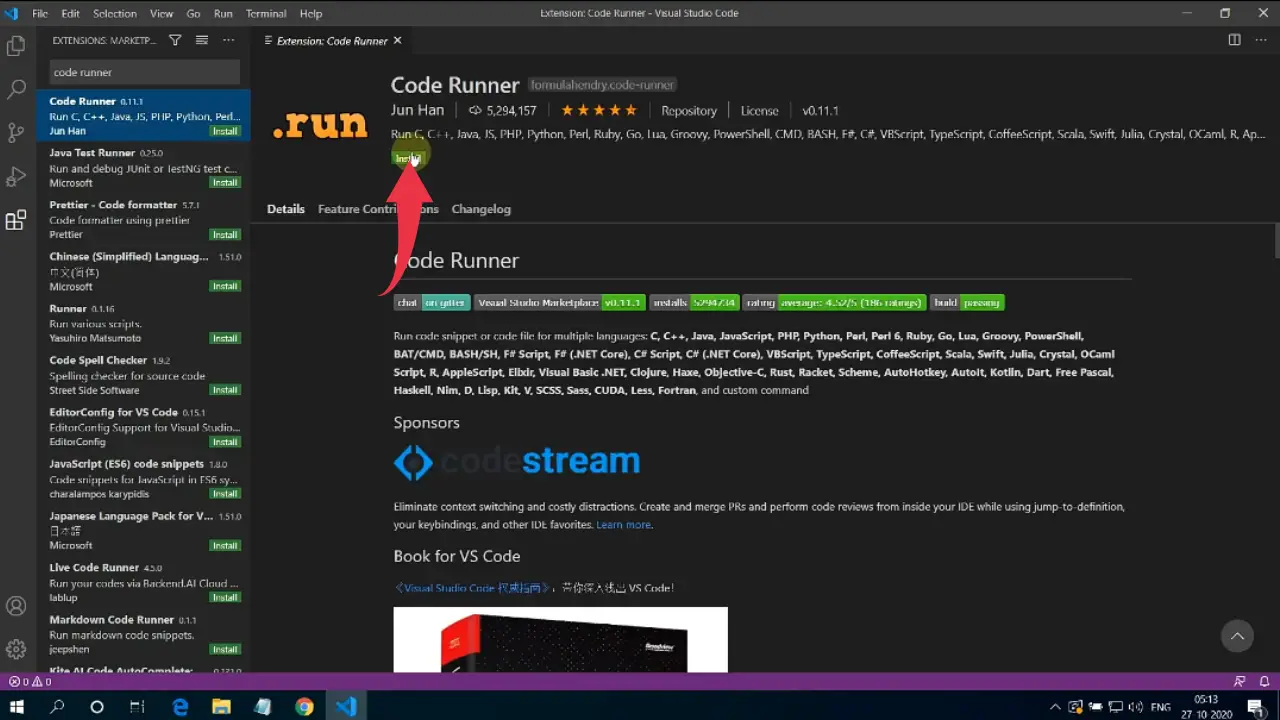
2) Now again in the search bar type “Code Runner”. And install the first option provided by Jun Han by clicking on the small green install button.
Step 4: Run Go Programs in Visual Studio Code
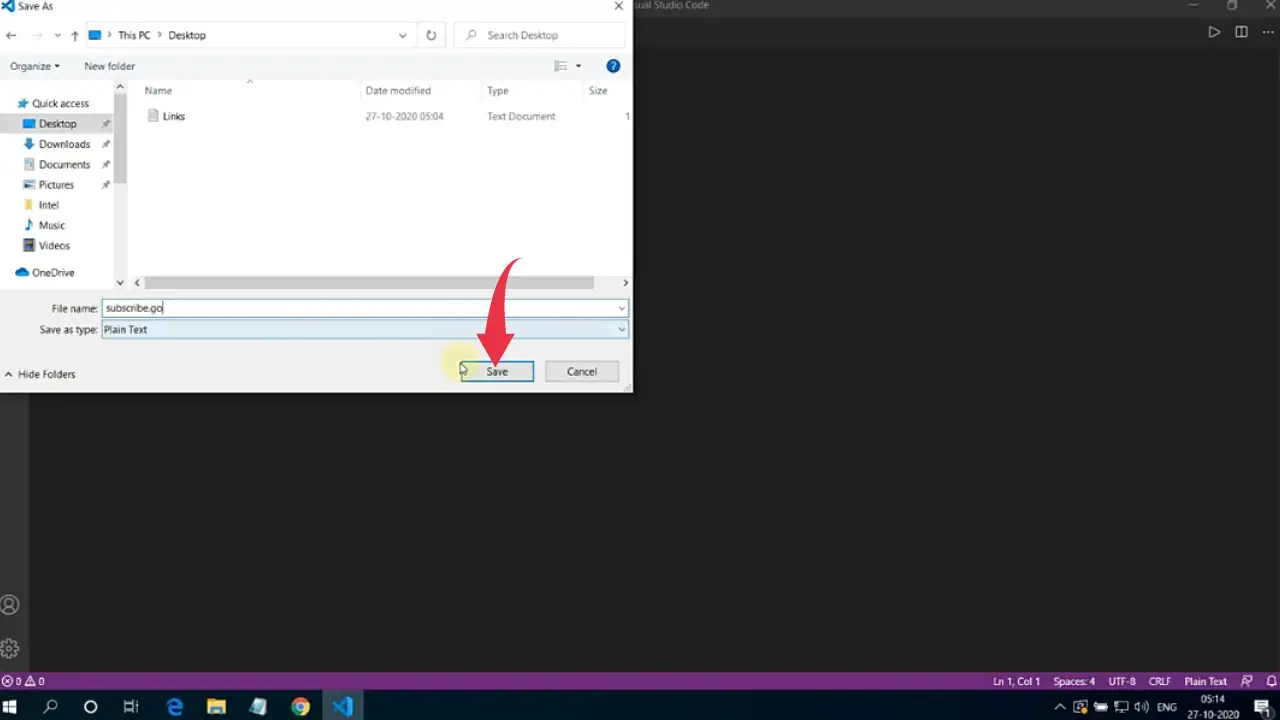
1) Come to the home screen of Visual Studio Code and create a new file by pressing “Ctrl+N”, save it by any name you prefer. In our case, it’s “subscribe.go”.
The key thing to note here is that you should always add a “.go” extension to a Go program otherwise vs code will not be able to detect the GO file.
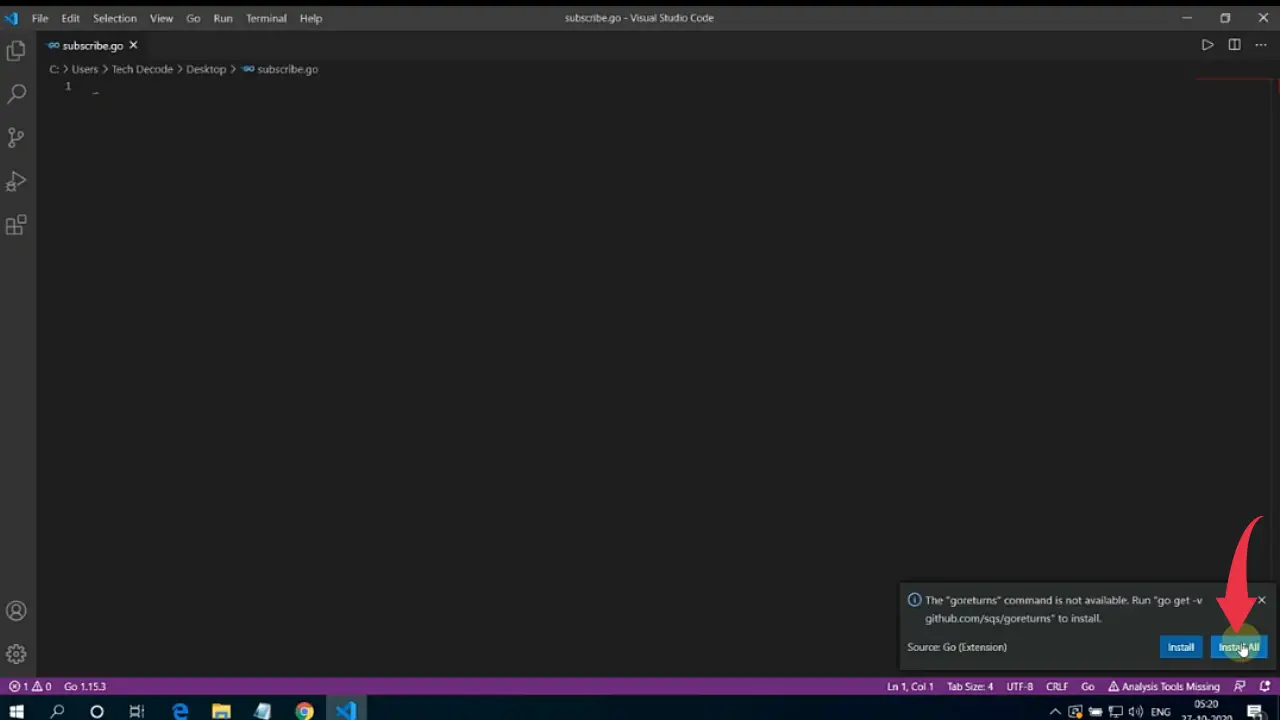
2) After saving the file, a small dialogue box will appear and in that, you’ll be asked to install the required assets for running GO programs. This is just one time process so simply click on the “Install All” button.
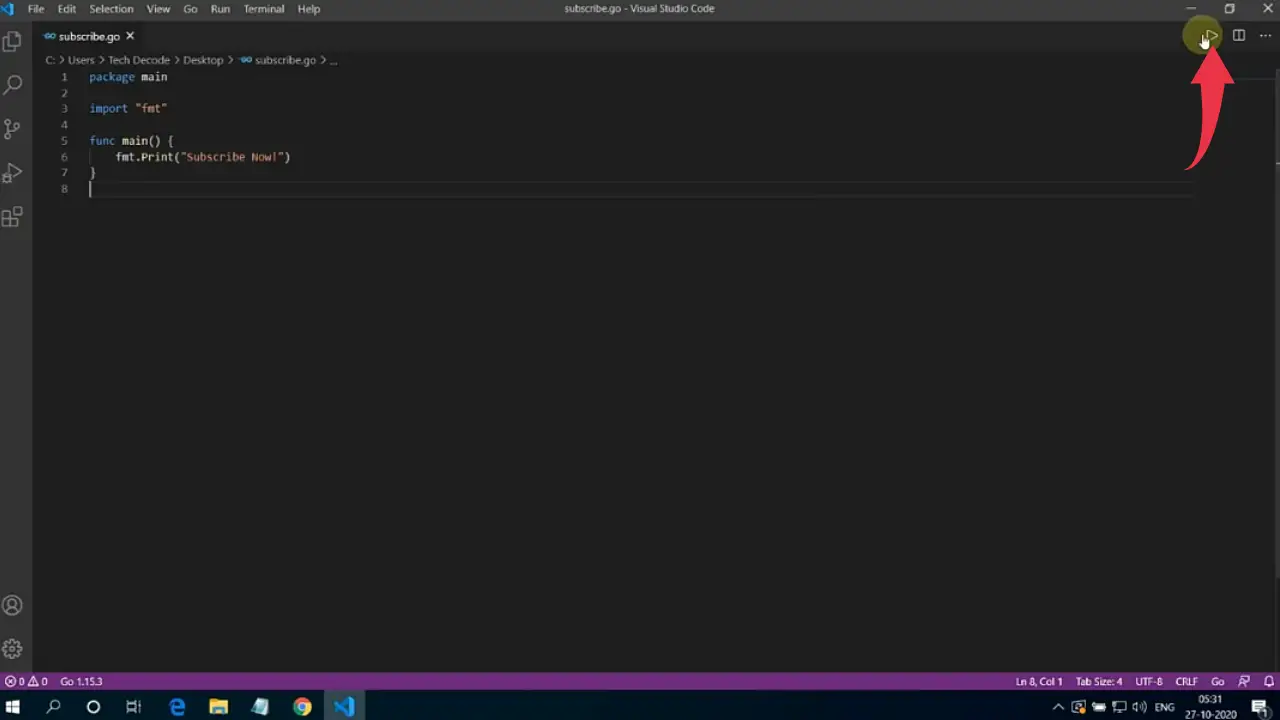
3) paste the below-provided GO code, save the file by pressing “Ctrl+S” and press the small play button to run the program.
package main

import "fmt"

func main() {

    fmt.Println("Subscribe Now!")

}
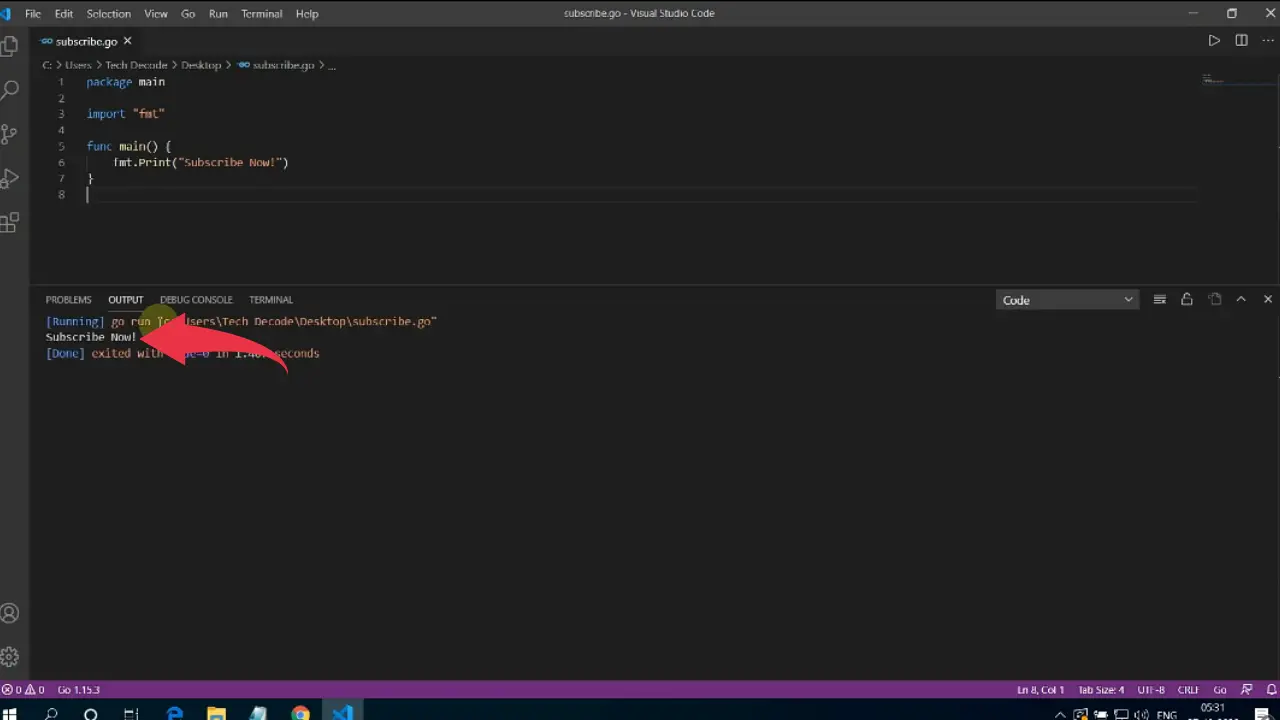
4) If you see something like the below image then congrats you’ve successfully executed GO programs in visual studio code on windows 10.
Video Tutorial: Run Go Programs in Visual Studio Code On Windows 10
If you’re still finding it hard to run GO programs in your Visual Studio code, then you can refer to the below video for a complete guide.
Also Read: How to run HTML code in Visual Studio Code on Windows 10


